10 Open Shelf Styling Mistakes That Look Chaotic (And How to Fix Each)
Introduction:
Open kitchen shelves promise that airy, magazine-worthy look. But too often, they become dusty catch-alls for mismatched mugs, half-used spice jars, and that one chipped bowl you keep meaning to move. Let me walk you through 10 common styling mistakes – and show you exactly how to fix each one with simple, beautiful swaps. No renovation needed.
The 10 Mistakes (Each with Fix)
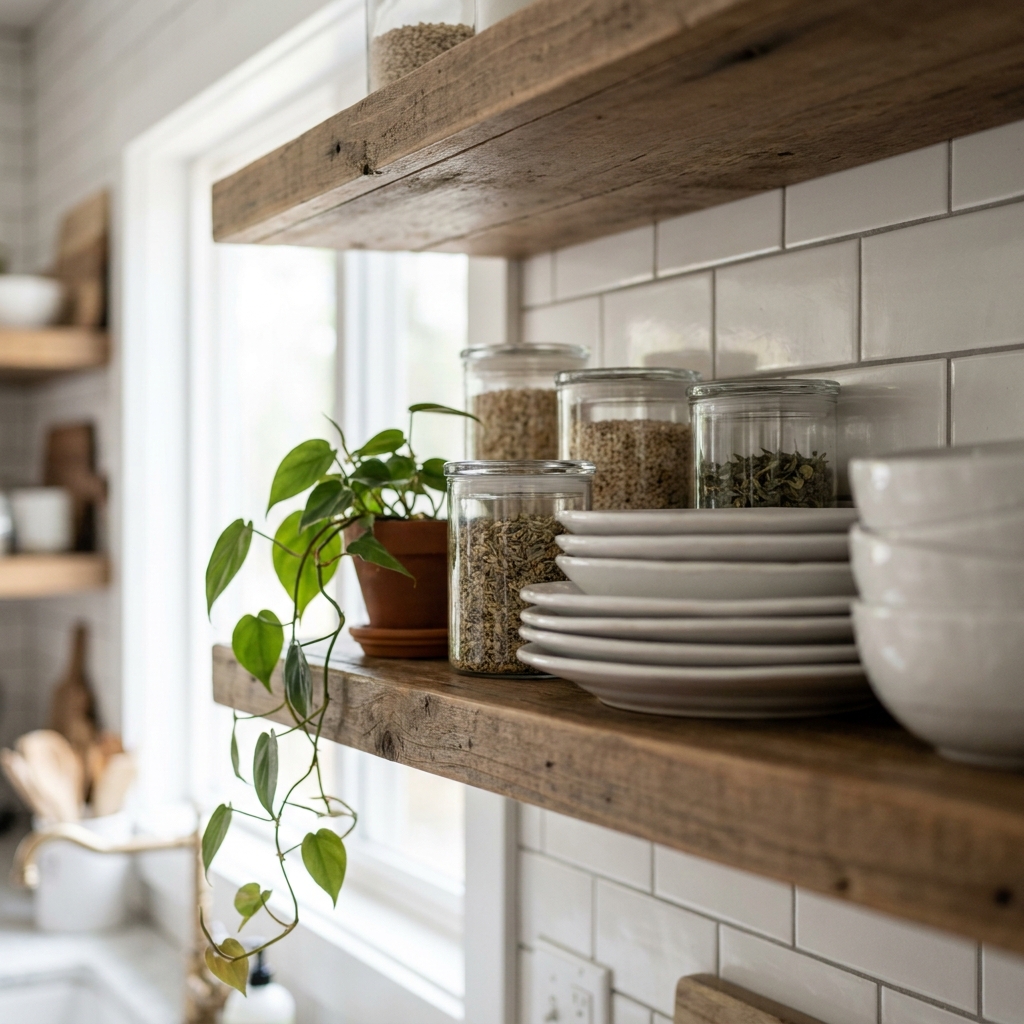
Mistake #1: The Crammed Shelf
Every inch of shelf space is filled from end to end. Items touch each other, stack on top of one another, and leave no room for the eye to rest. The shelf looks more like storage than styling, and nothing special stands out.
“The 70/30 Rule Shelf” – leave at least 30% of each shelf completely empty. This empty space acts like punctuation, giving your displayed items room to breathe and making each piece feel intentional rather than stuffed.
Key Pieces: Group of 3 white dinner plates standing vertically, 2 low stackable bowls, 1 small trailing plant in a simple pot.
Mistake #2: The Rainbow Effect
Your shelf has a red mug here, a blue plate there, a yellow bowl in the middle, and a green canister off to the side. Every color fights for attention, and the overall look feels chaotic, childish, and anything but calm.
“The Neutral Core” – let 80% of your shelf items live in one neutral color family like warm white, cream, beige, or matte black. Choose just ONE small item in a pop color as an intentional accent, not an accident.
Key Pieces: 6-8 pieces of matching white or cream dinnerware, 3 matching clear glass canisters for dry goods, one single cobalt blue or terracotta vase as your only color accent.
Mistake #3: The Dusty Museum
Pretty bowls sit untouched for months. Decorative plates are too high to reach. You’ve created a display that looks nice from afar but never gets used. Dust settles, and the shelf feels more like a roped-off exhibit than part of your kitchen.
“The Weekly Rotation Shelf” – only display items you actually reach for at least once a month. If you haven’t touched it in four weeks, it belongs in a cabinet, not on display. Rotate seasonal pieces in and out to keep the shelf feeling fresh and lived-in.
Key Pieces: Your everyday cereal and soup bowls, coffee mugs from this week’s rotation, a small tray holding the spices or tea bags you use daily.
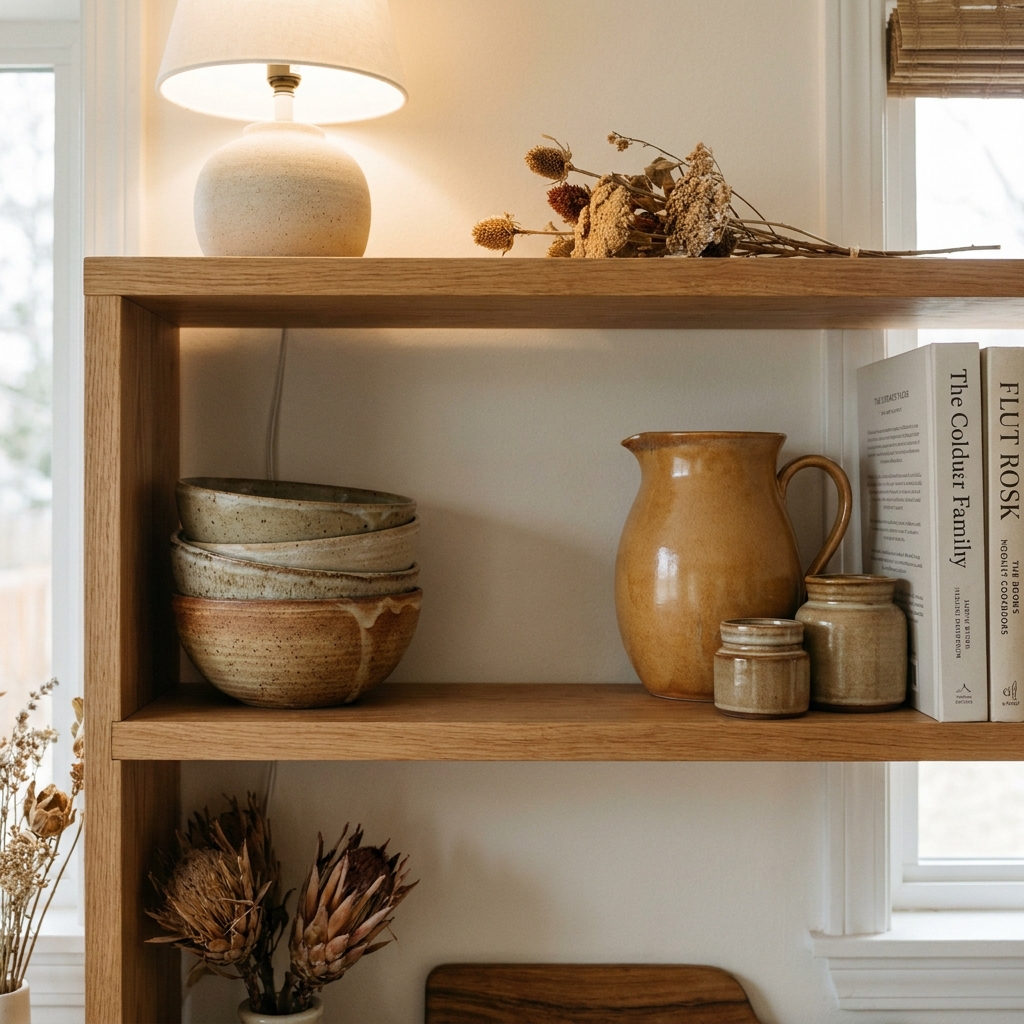
Mistake #4: The Jumbled Height
Every item on your shelf is roughly the same height. Short bowls, short plates, short mugs, short jars. The silhouette is a flat, boring horizontal line that offers no drama, no focal point, and no visual journey for the eye.
“The Staircase Silhouette” – arrange your items like a staircase or a mountain range. Put tall pieces (vases, pitchers, tall jars) at the back corners. Medium-height items (stacked plates, canisters) go in front of them. Smallest items (salt cellars, small candles, espresso cups) go at the very front.
Key Pieces: One tall ceramic vase or pitcher for the back corner, 3-4 dinner plates stacked flat for medium height, 2 tiny pinch bowls or a small candle for the front edge.
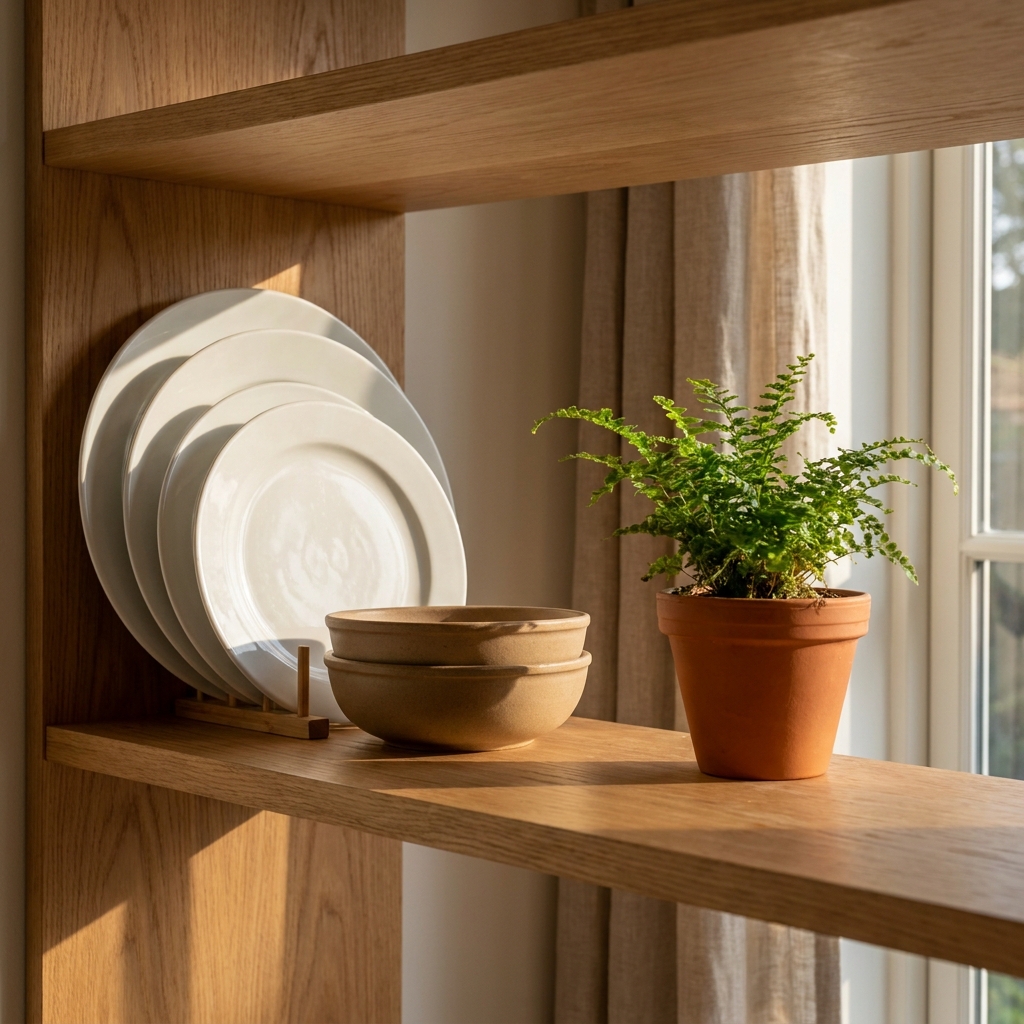
Mistake #5: The Lonely Item Scatter
Your items are spaced evenly apart like lonely soldiers. One mug, then a gap. One bowl, then a gap. One jar, then a gap. The shelf looks scattered and disconnected because nothing feels connected to anything else.
“The Clustered Triangle” – group your items in odd numbers (3 or 5) with the pieces touching or nearly touching each other. Then leave a visible, intentional gap before the next cluster. Think of each cluster as one visual unit, not individual pieces.
Key Pieces: Cluster A – 3 small bowls stacked together. Gap of 2-3 inches. Cluster B – 1 medium pitcher with 2 small jars tucked on either side of it. Gap. Cluster C – 5 small espresso cups lined up touching.
Mistake #6: The Visible Chaos Behind
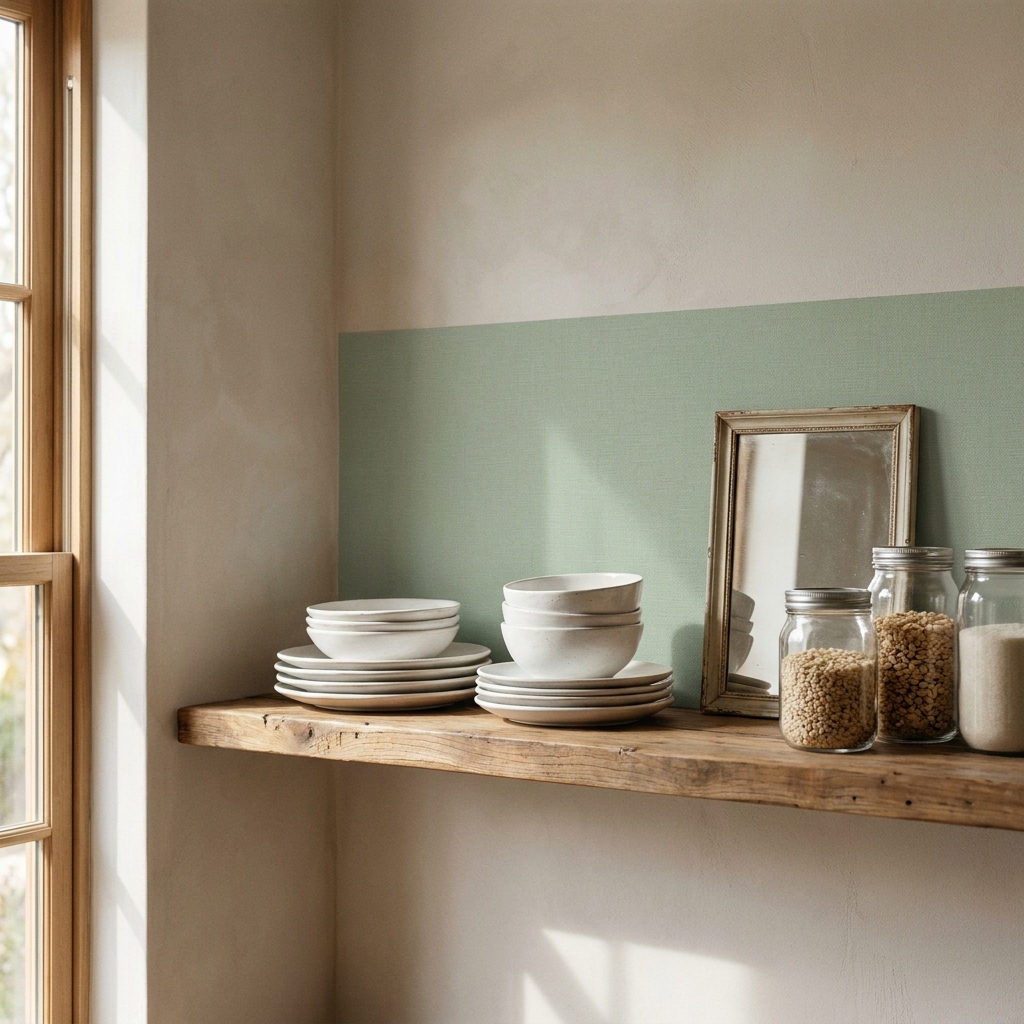
When you look at your shelf from an angle or from across the room, you see messy stuff behind your nice dishes. Maybe it’s an ugly wall color, exposed cords, or just the chaotic backsplash. The backdrop is fighting your styling.
“The Backdrop Anchor” – add a clean visual boundary behind your shelf items. A strip of removable peel-and-stick wallpaper, a small framed mirror leaned against the wall, or even just a painted rectangle in a contrasting but calm color creates a designated “stage” for your display.
Key Pieces: One roll of removable wallpaper in a subtle pattern (thin stripe or small dot), a 8×10 framed mirror or artwork to lean, or a small can of washable paint in a soft contrast color like pale sage or warm putty.
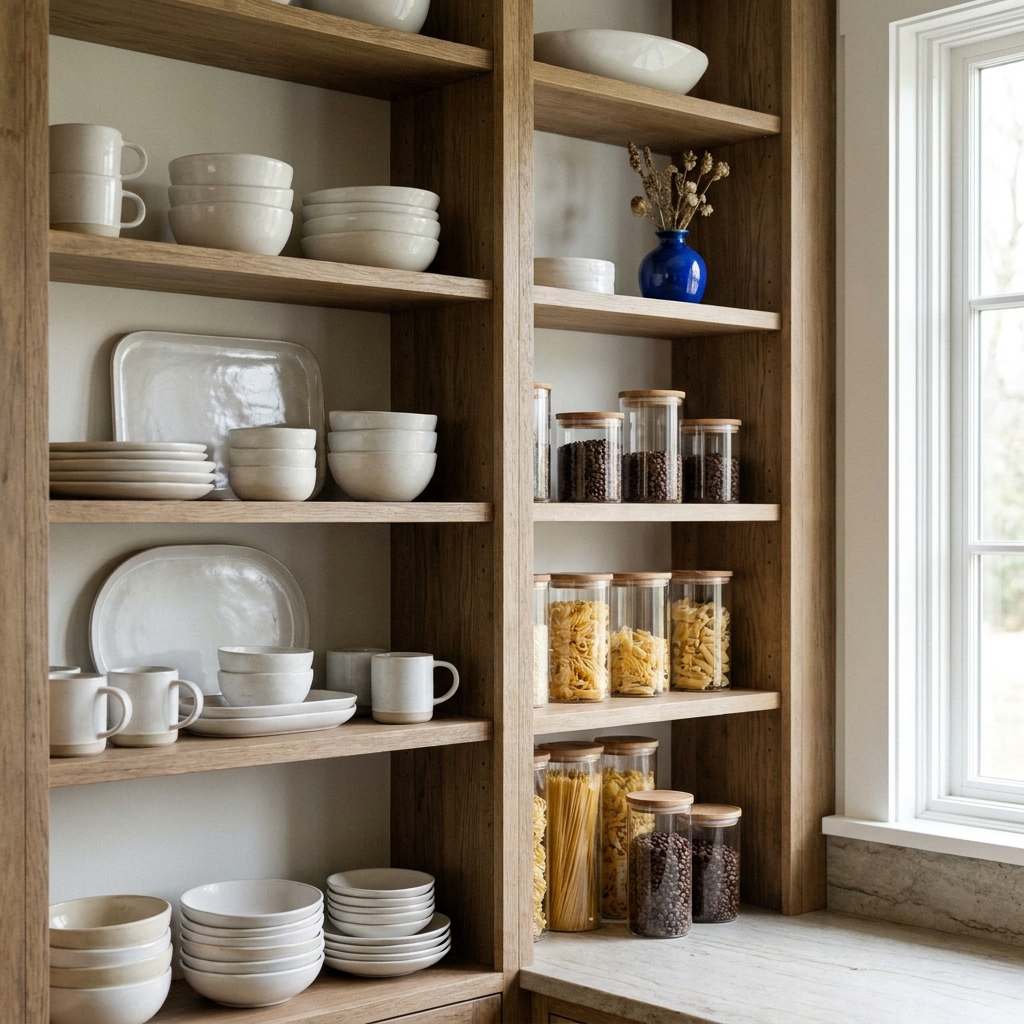
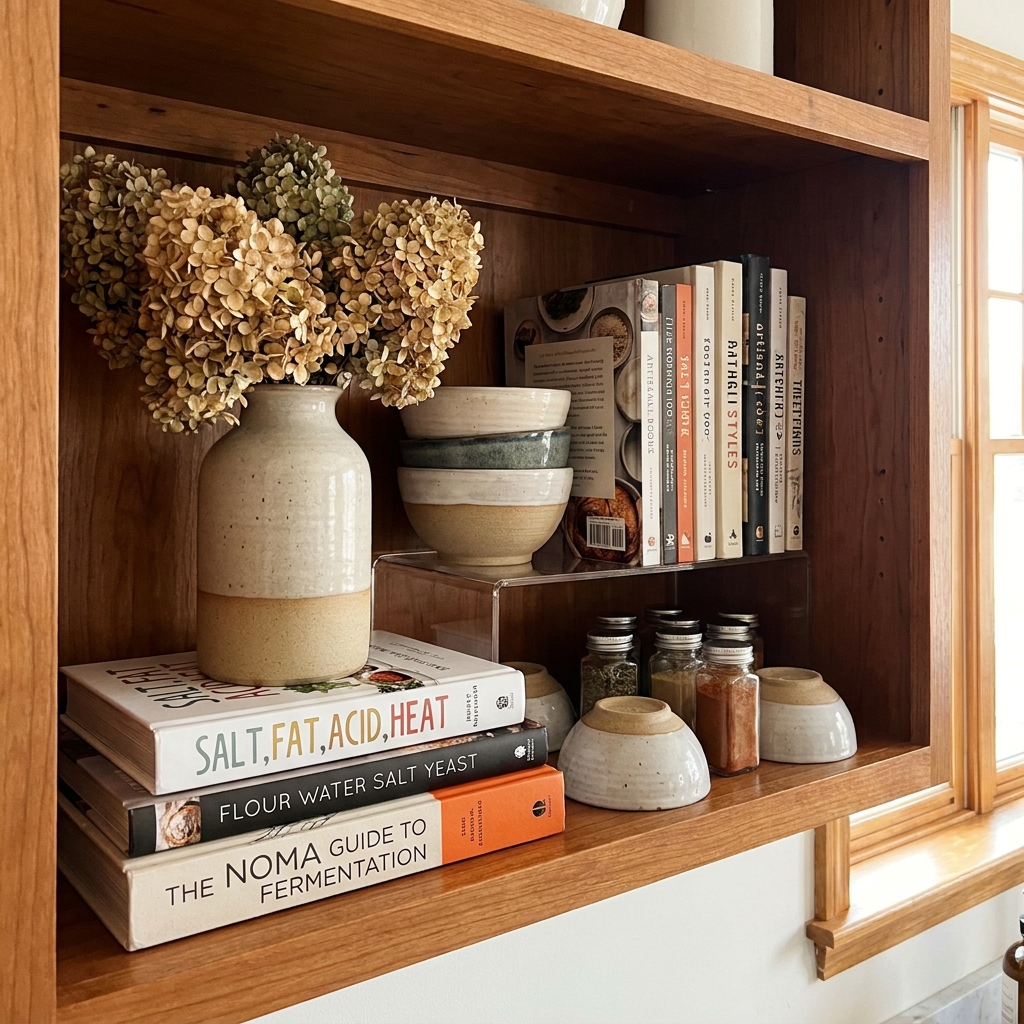
Mistake #7: The No-Zone Confusion

Your shelf has coffee mugs next to pasta jars next to cookbooks next to candle sticks next to dog treats. There’s no rhyme or reason to what goes where, and the shelf feels random and unfocused.
“The Dedicated Zone Shelf” – assign each shelf one clear purpose. One shelf is the breakfast zone (bowls, oatmeal canister, honey pot). Another shelf is the coffee zone (mugs, coffee canister, small spoons). A third shelf is strictly decorative (cookbooks leaning, a plant, one small object). No mixing zones.
Key Pieces: Small adhesive labels hidden on the underside of each shelf to remind you of the zone, one shallow tray to visually contain each zone’s items, a rule that nothing crosses from one zone to another.
Mistake #8: The Spilling Plant Wreckage
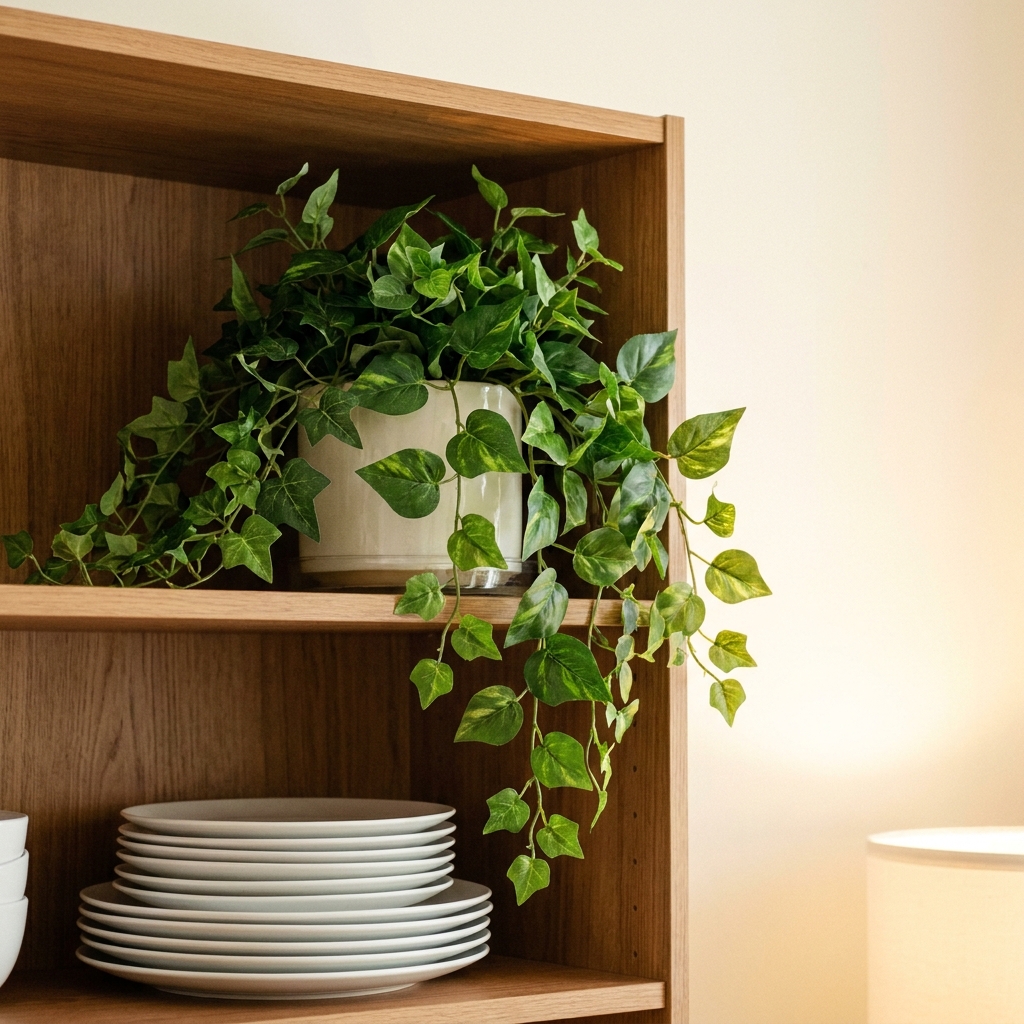
Your beautiful trailing plant drips water onto the plates below it. Dried leaves fall into open bowls. Water stains mark your wood shelf. Real plants and open shelves are fighting a losing battle.
“The Elevated Green” – either switch to high-quality faux trailing plants that never drip or drop, OR place real plants only on the topmost shelf inside a completely sealed cachepot (a decorative pot with no drainage holes) with a hidden plastic liner. Never put a real plant above dishes you eat from.
Key Pieces: One strand of high-quality faux ivy or pothos (look for real-touch versions), one ceramic cachepot with a sealed bottom, a small round plastic liner that fits completely inside the pot, waterproof shelf liner cut to size.
Mistake #9: The Dusty Deep Shelf
Your shelves are deep (12 inches or more) and items get lost in the back. You forget what’s back there. Dust covers the forgotten items. The front half of the shelf does all the work while the back half becomes a dark, dusty void.
“The Layered Riser System” – lift back items up so they’re visible above the front items. Use small acrylic risers, overturned bowls, short wooden crates, or a stack of large books as a base. If you truly never use what’s in the back, move it to a cabinet and only display one layer deep.
Key Pieces: 2-3 clear acrylic risers in different heights, 2 overturned ceramic bowls to use as pedestals, a stack of 3 large hardcover cookbooks as a solid base, or simply a commitment to only displaying one row of items per shelf.
Mistake #10: The No-Edge Frame
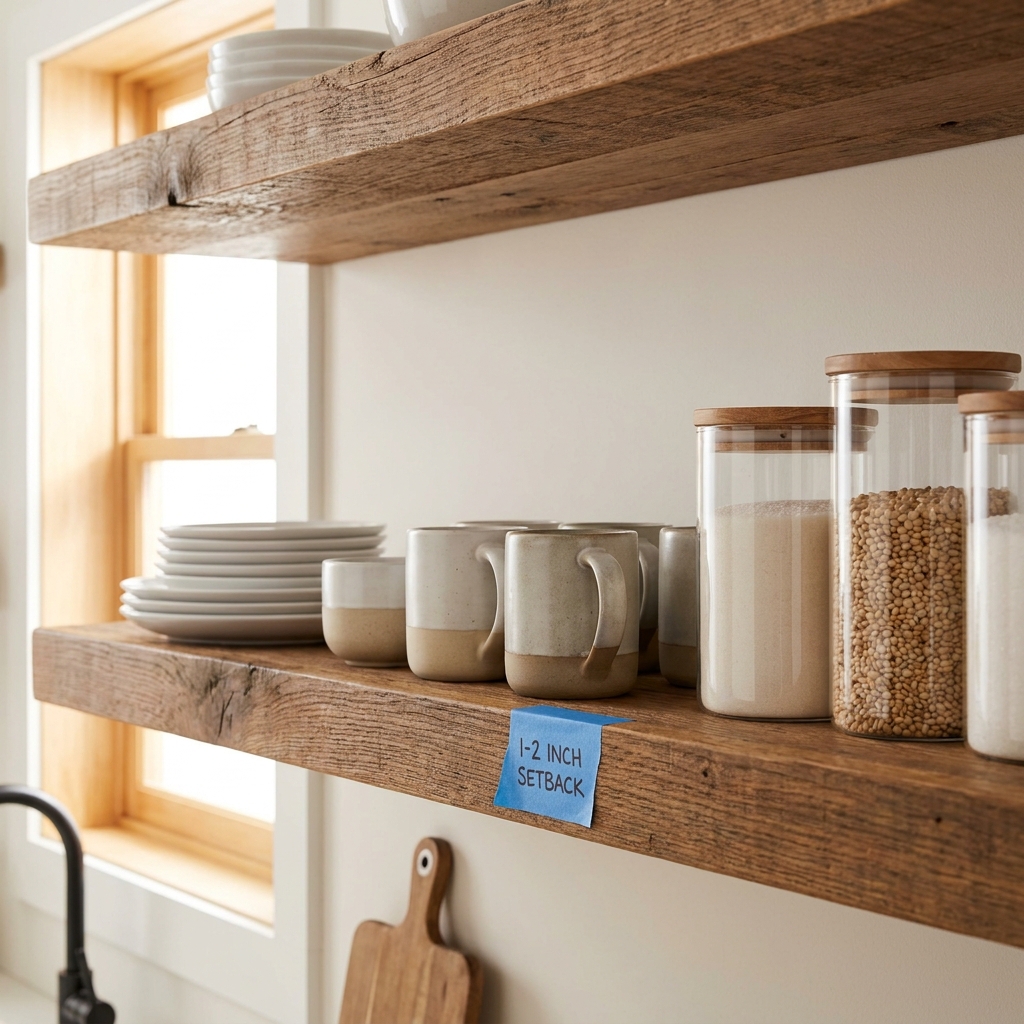
Your items are pushed all the way to the very front edge of the shelf. They look like they might tip off at any moment. The shelf feels precarious and unfinished, like someone forgot to finish arranging it.
“The Breathing Rim” – pull everything back so the front edge of every item sits 1 to 2 inches behind the front lip of the shelf. This creates a clean, intentional leading line and gives each item a visual “frame.” It also makes the shelf look deeper and more luxurious.
Key Pieces: A small ruler or tape measure for the initial setup, a piece of blue painter’s tape stuck temporarily along the 2-inch line as a visual guide until you train your eye, and 5 minutes after each shelf cleaning to reset the alignment.
Cheat Sheet Table
| Mistake | Quick Fix |
|---|---|
| Crammed shelf | Leave 30% empty on every shelf |
| Rainbow effect | 80% neutral colors, one small accent |
| Dusty museum | Only display weekly-use items |
| Jumbled height | Create a staircase silhouette |
| Lonely item scatter | Cluster in odd numbers (3 or 5) |
| Visible chaos behind | Add wallpaper or painted backdrop |
| No-zone confusion | One purpose per shelf |
| Spilling plant wreckage | Faux plants or sealed cachepot |
| Dusty deep shelf | Use risers to lift back items |
| No-edge frame | Align items 1-2 inches from edge |